A View of My Life - Quilt and Other Things

Monday, August 31, 2015

A New, Vintage Singer Project

I made my first ever Craigslist purchase over the weekend.  Just two towns over, a nice young gentleman had these listed for sale

along with this.


Can you say SCORE?!  Oh, wait, I should explain.  I recently saw this on the Quiltville Open Studio Facebook page and showed it to the DH. 


The very same DH who has just started his woodworking workshop in our garage.  He told me that if I could find the irons, he would make me this bookcase.

I totally scored!  I got the four drawers (fair condition) and the irons (a little surface rust - no big deal) for $40, less than 15 minutes from home!  

Just need to decide on which wood I want for the shelves - maple? cherry?  And then what color do I want to repaint the irons - black? hammered bronze? antique pewter?  These are the kind of decisions I like to have to make.  

Then there are the drawers - I may have a perfect plan for them, just need to take some measurements.


Friday, August 28, 2015

Hate it When DH is Right

Well, usually only when he's right and it means more work for me!

It pains me to say it of course but... 

The DH was right about painting the ceiling in the studio!

New ceiling color closest to the wall - nice, clean, bright, flat white
I mean really, why wouldn't I paint the ceiling when I am painting walls, whitewashing and polyurethaning wood siding and faux beams?  To be completely honest, it means many more trips up and down the ladder. UGH!!  See the wood walls are done. And I'm on to the beams.  The require a 3 step process. White wash stain on the beams, wait, wipe excess stain off. Wait at least one hour.  Apply first coat of polyurethane.  Wait at least two hours. Apply second coat of poly. The beams span the width of the room and each step requires at least four trips up and down the ladder for each beam. There are 9 beams.


To paint the ceiling, I have to use the ladder; I can't use the extension pole because of the beams.  I have to carefully cut in the edges next to the beams and use a small roller for better control. Which translates to four more ladder trips, per section of ceiling, across the width of the room.  And yes, I have to do it in sections at this point, just feathering out the roller strokes as much as possible.

BUT dang it, if it isn't worth it!  Not only will the new paint look good, it will reflect more light AND I'm getting a workout. 

Of course, it would go faster if I hadn't just shoved most everything to the middle of the room but there is really no where to move all of this stuff out of the studio.  However, I am almost, almost ready to shift something back to the edges of part of the room.  And the DH said now that his recent larger wood project is done, we can put the bar out in the garage and not yet bring in the drawer unit. 


Sewing bar circa Dec 2013 - it has more things on it now.
This will definitely give me some breathing room to get the redo done. Much like quilting - Ever Forward!!!

Wednesday, August 26, 2015

Raising the Ceiling

Wallpaper border removal commenced in all seriousness.  DH was worried it would be hard to get the border off the wall.  He has never removed wallpaper before, only seeing nightmare removals on DIY shows.  I have a secret weapon that has yet to fail me - hot water with a bit of dish soap. 

I peel up a corner of the top layer off, pulling it as far as it will go. Then I use a sponge and soak  the under layer edges in the water.   The soap dissolved the glue and I use a plastic scrapper to get another strip to lift up and then pull off as much as I can. Repeat over and over. This border was easy to get off.  


What amazed me is how much taller the room looked once the border was off.  It was a wide border.  


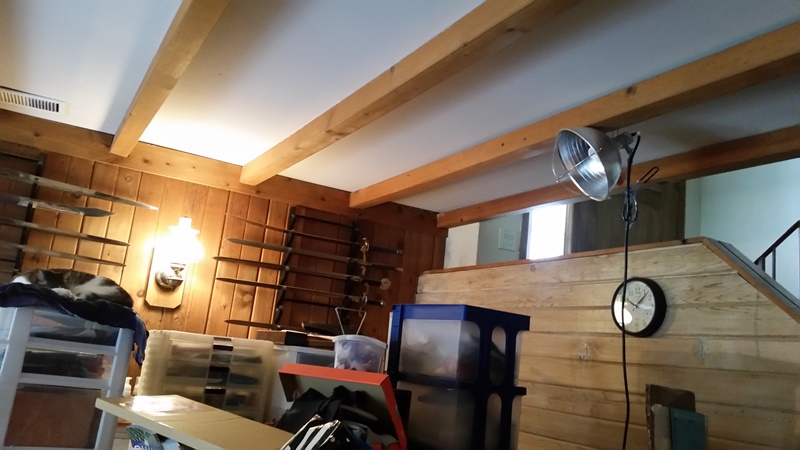
Couple that with the wide top trim board and you have a visually low ceiling. Add in the dark wood and the ceiling beams and the studio was a low ceiling, light absorbing, dark-ish tunnel.   


The DH offered to try removing the beams entirely but I declined at this point. So don't want to create another project that could be a huge kettle of fish!

Tuesday, August 25, 2015

Studio Colors!

Progress has been made on the studio redo.  The upper part of the long wall has been whitewashed and 2 coats polyurethane.

The color chips were narrowed down from this


to this, with the addition of one new  color card.  


At this point I eliminated the top two cards and then called in DH for the final decision - just to confirm my selection.  Of course, I picked the green from the last card I added.  Then we needed to find a cream color...

We quickly narrowed it down, as it had to work with the wall green (Glidden's Soft Venetian Glass) and the whitewashed wood.  The cream (Behr's Nice Cream) will go on the shelf and on the wood light surrounds.


The next step is to get the 9 beams whitewashed and polyurethaned.  There was more work done on the room that I'll show you tomorrow.  One step closer to getting my studio back.

Thursday, August 20, 2015

Facing Fabric Facts

Since I have the studio looking like a bomb went off, no stitching or designing or cutting or quilting can take place.  So until I get all the repainting, reorganizing and renewing done, this blog will contain updates on the process and progress but not much fabric fun. 

I promise as soon as I can, we will return to the fabric side.  Believe me, I can't wait to see the end result of this redo.  A few more paint chips have joined the ones on the wall.  I got to thinking about the warmth of the whitewashed walls, so the new colors are some pale, slightly muted, warm greens.

Can't get a good picture of the swatches but this gives you a good idea.

DH and I lucked out on the new wall sconces. We found a double light fixture on sale for 40% off and they had two of them. The bonus is we didn't have to spend hours hunting them down.

The lower half of the long wall is whitewashed and has two coats of poly already.  The swords are in a safe place so I can tackle the upper part of the wall.  


I even started removing some of the wallpaper border, where the wood meets it. 
Yes, this is after the wall was already washed!
It's amazing to see the wall color difference where the border was vs. the rest of the wall. Wow - Way past due for a face-lift. I have to admit the thought of whitewashing all the beams is giving me some pause.  I'll tackle them but it's going to be an adventure! DH bought me one of those disposable paper paint suits with a hood. He knows me so well.


Wednesday, August 19, 2015

Studio Decisions

Since the woods walls are getting whitewashed the other walls are long overdue for a color change.  I am tired of pale vanilla.  The wallpaper border is going away.

Current design wall - needing a serious change

That means a decision needs to be made on wall color.  A few paint chips followed me home from Home Depot.  I want a pure, pale color.  The white washed wood walls remind me of a beach cottage so I'm leaning to a blue/aqua/green palette. 


DH helped me decide that the beams should be whitewashed, too.


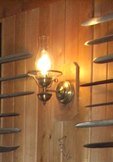
And something seriously needs to be done about the current wall lights.
Wall sconce missing its early American milk glass shade - but still awful
The swords on the wall will be coming back once the walls are redone. 

Tuesday, August 18, 2015

Studio Upgrade Begins

Sewing and working in the studio is like sitting in a brown paper bag.


Since Wil has claimed part of the garage for his new woodworking shop, we are reorganizing some of the storage units out there.  A four foot double drawer with a laminate worktop will be moving in to my studio.  This means the bar that we have never used as a bar, which currently holds boxed projects is slated to leave.  I will gain better storage and another counter height work surface - YAY!!

The shuffling around is a perfect time to address the wood walls. They are stained pine, real wood, but not finished with a sealer of any kind.  The attract dust and absorb light.  I've been wanting to lighten these for some time and this weekend turned out to be the time to start. 


I am using a Antique White stain by Varathane. 


The shadows make the color look more uneven in the picture. I'll be finishing it with 2 coats with polyurethane in a satin finish. More changes are coming but getting the walls underway is a welcome start.