A View of My Life - Quilt and Other Things

Monday, July 10, 2017

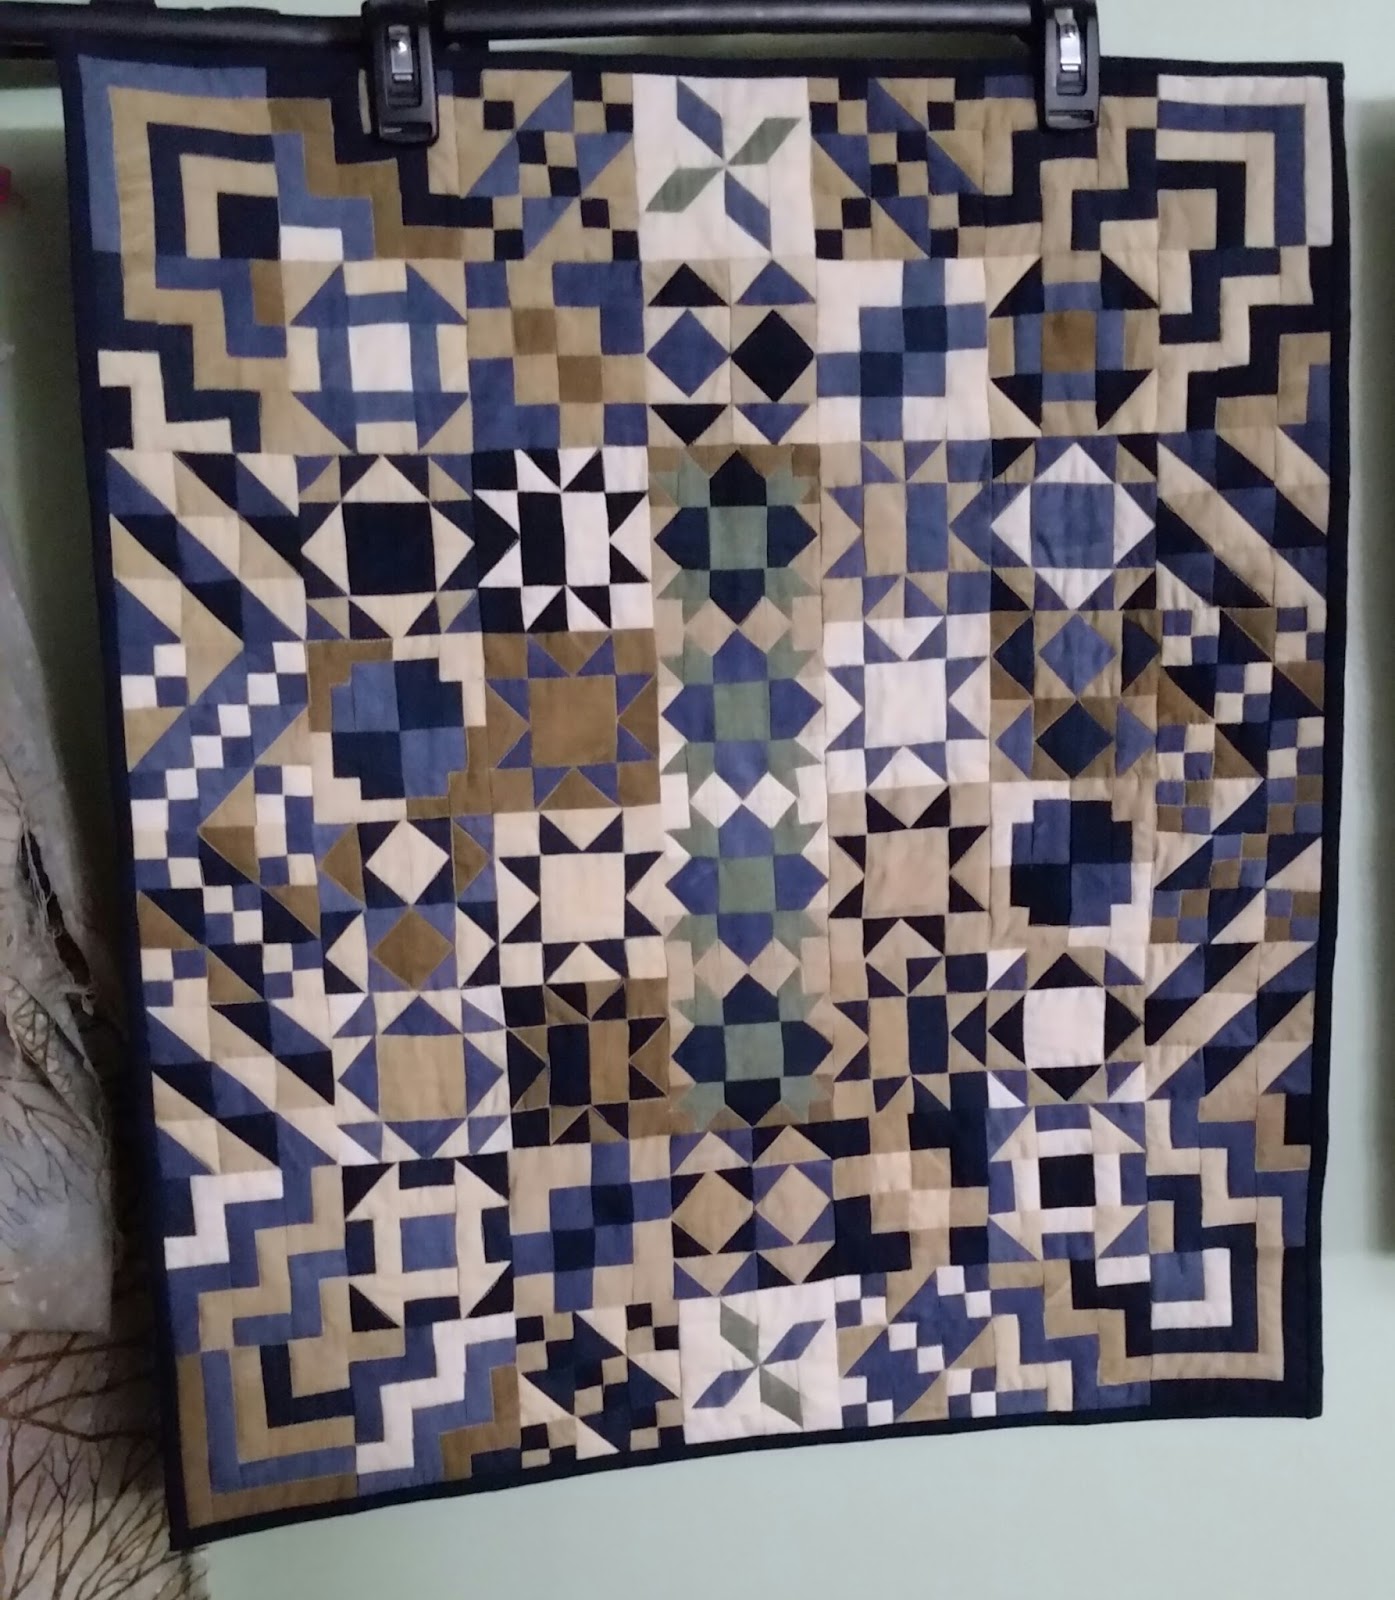
Finish - Solstice Sampler


YAY!!  I have a Finish to share with all of you!

But first, some process/progress pictures of the past few weeks.
In keeping with the aged muslins used, I wanted a basic color thread.  I choose this YLI hand quilting thread.

In hindsight, I should have gone to a darker variegated or a darker cream/beige solid for an even more aged look and better blending, especially given the quilting.  I forgot that with mini size complex blocks, there are a lot of seams to traverse and you occasionally get some bobbly quilting lines because of them.

I like the look of the back. 

It's amazing how much time it took to quilt this small project (21 inches by 24 inches).  But turning every 3/4's of an inch take time and patience. The outer rows of blocks went a little easier because I could keep going from one block to another and then another. Harder to do that on interior rows because I didn't stitch in the ditch first to stabilize the project. So glad when I got to trim stage

I auditioned all the colors for binding and landed on the darkest blue to frame it.

And finally - Solstice Sampler


I really like the Marcus Fabrics Aged Muslins.  I want to design another full size project with them and there are more colors available in this line. 

I've been quilting on the Phoenix project so a post on that is coming soon, along with some non-fabric, quilting related things.


Thursday, June 29, 2017

Phoenix Rising is Up

Back in May, the center section was completed. The pieces were fused down & looking good.

Note to self: When using commercial solids, you need to stitch down the raw edges.  The solids are NOT the same as hand dyed fabrics that fused hard & fast.  Do the edge stitching BEFORE you layer the quilt. DO NOT get cocky & ahead of yourself!

The first round was to add the required flying geese.

It went fairly well and I was pleased. 

The on to the second round - applique was required and it needed to reflect the sun.

I actually did this the hard way - I appliqued each of the four sides and then attached them.  What I should have done was to attached the black border strips all the way around and then laid down the sun & the rays.  The alignment would have been easier, with smoother transitions. SMH. 


It was like I was looking to make this harder than it needed to be or else half my brain was somewhere else on this project day.

Last round was all about squares & rectangles! 
Parts lined up and ready for stitching
I wanted something big & bold to balance the sun sections.  Which meant I was thisclose on some of the fabrics and had to run out and buy a bit more. 


Of course, I discovered the shortage (one yellow rectangle, 2.5 x 6 inches) while I was up in Michigan so I couldn't get the last round on  & the quilt layered while I was up there. Talk about frustrating! But that was nowhere near as frustrating as what I did when attaching the first section of the final border.

Had to laugh at my mistake!  And bust out the seam ripper. Last but not least - the corners.  I couldn't just have plain corners, now could I? Nope - all seven of the warm colors needed to make an appearance to tie everything together.  The only way to do this was square in a square in a square.  And the only way to do that was to paper piece them. 

The extra fabric I purchased was to also cover the corners. Each corner has 25 pieces in an 8 inch square. Feels like you are going round and round and round forever.

The final quilt top of Phoenix Rising.


I like the back shot, too.

The  sandwiching was done using the board method and the quilting has commenced. I'll share that in the near future.


Wednesday, June 21, 2017

Catching Up on the Solstice

Kind of ironic that I am posting about the Solstice Challenge quilt on the Summer Solstice - well, a day after actually.

Way back when, I embarked on following Pat Sloan's Solstice Challenge . In my usual style of let's take this challenge up a notch, I decided to shrink the planned 12 inch blocks down to 3 inches. Sounded good in theory, didn't it?!

As it turns out, not all the blocks were 12 inches, square or lent themselves to be shrunk down that much. What's a quilter to do?
Luckily, I was several weeks (READ: months!) behind so I could look at the project as a whole, rather than on a weekly block piece by piece.

The original plan was to make 2 of each of the 25 blocks plus 6 extra for a total of 56 blocks, set 7 wide by 8 long. Since not all of the blocks could be used, it was obvious that I would need to be a little more deliberate in my planning and layout design. This is where PowerPoint came in handy.


I could move blocks around at will, plan how many of each I needed to make and get busy at the machine. Most of the blocks were either a 9 patch or 16 patch layout so they lent themselves to the shrinking part of my idea.  Except - see the four blocks in the center column? 

That a 36 patch layout.  Fractions of 5/8s & 3/8s were used it those! They were also the only blocks with a planned color scheme and the first blocks that had the light green. As it turned out, I used the green in only two other blocks. All of the other block's color schemes were random.
Yes - that bugged the crap out of me!  I would like to do a second version of this quilt using the same fabrics but with a much more planned color placement. Really like the way I graded the background fabrics in the center column so if I make another version, I would expand on that.

Here are all the blocks laid out

with the sewing together commenced on the top two rows. A little persistence & it's a top!

While it's not quilted, it was finished being pieced before the Solstice and I'm happy I was on track time-wise!

For comparison, I borrowed this picture from Pat Sloan and her completed Solstice Challenge quilt.

Stay tuned as this will be layered using the pool noodles and then machine quilted.


Tuesday, June 20, 2017

I Have LAPTOP!


And now, FINALLY it's been switched on.  It has more memory, and is an upgrade in size. And it has Windows 10. Which I have never used before. ergh.

Really - I am not computer illiterate but the thought of starting all over with a new laptop made me nervous and unsure of myself. Or maybe I was just being silly. But this was totally me yesterday.


The keyboard will take some getting used to, as will the photo editing capability.  Just different is all. And I need to create folders and move files.  Some of that can wait, some can't.

I have been sewing and making serious progress on three projects.

To ease back into blogging, I'll start with sharing something new I learned.

While I LOVE having the wide expanse of the tile floor at the Michigan House for sandwiching quilts, I do not love scooting around on hands and knees, placing and closing 48,659,781,347 safety pins on that wonder, if unforgiving, hard as iron tile floor.


I had heard about using boards and/or pool noodles for the layering process. I hunted down some online videos to fill in the details and set about securing the necessary equipment. I added pool noodles to the grocery list, which caused the DH some head scratching moments when he was out doing the shopping. In the meantime, I hit the local home improvement store and picked up some 7 foot pre-primed trim boards.  I went with the seven foot length, as they will fit into my truck easily.  I also grabbed some wood dowel rods to put into the center of the pool noodles for stability sake.

Supplies in hand, I head to the Michigan House so that in the event of an epic failure, I could always fall back on the floor. Literally. I also brought along a 3 x 6 foot table to layer on & a large roll of painters tape, again just in case I ended up on the floor.

Since I had three quilts that needed to be layered, I started with the Construction Equipment quilt, so I could work out the kinks.  Of all the current projects, this would be the most forgiving to work on - large pieces with fewer seams. Very straight forward indeed.

Based on the 64 x 84 inch size of the top, I started with the board method.  In the video, they recommend starching the heck out of both the top and backing.  Nope - that's a definite no-go on the two large quilts.


It worked fairly well.  I did notice a tiny bit of backing fabric distortion as I rolled it up.  I wonder if my boards have a slight warp to them. I did eyeball them when I purchased them but I'll need to check them against a level.  The DH has offered to round over the sharp edges so they match the beveled edges.

The two large quilts got layered.  The third - the Solstice Quilt - was still in process of being pieced.  When it's done, I'm planning on trying out the pool noodles for layering that one as it only measures 21 x 24 inches.  It has a TON of seams so it will be a different experience.

But all in all, I'm OFF the floor!!  Now I need to find a fun, new laptop skin.


Thursday, June 8, 2017

This Blog Has Been Rudely Interrupted

By the untimely demise of my trusty, Toshiba laptop. 
After seven years of faithful service, it is worn out and ready for retirement. 

And I need to find a suitable replacement. ARGH!!!
Normally, my shopping maven gene kicks right in and off I go. This will be a little trickier. 

I do have it narrowed down so hopefully I'll be back to blogging very, very soon. Things have been happening in the studio! And I'm anxious to share them.
See you all soon!
Cherry

Thursday, May 25, 2017

Van Gogh Challenge - Cow Parts

Up now - Cow Parts!
Tracing pattern pieces to the back of the fused fabric

Cutting, cutting, cutting!


I started from the 'back' to the 'front' fusing the pieces down.

I like having the drawing on the floursack to help with the alignment of pieces to fuse.

Looks kind of funny 


but neat to see the cow come to life.


And there it is - a blank cow! That's as far as I got while in Switzerland.   The was rolled up & brought home in this state.  I've have more progress to show after the last few weeks work.


Wednesday, May 24, 2017

The Van Gogh Challenge Story - The Beginning.

In order to tell this story on this quilt, we need to travel back in time. 

 February 2017: Van Gogh in Switzerland

I only took two fabric projects with me when I was stationed in Lucerne.  The most important one was the Cherrywood Van Gogh Challenge project.

I knew from the beginning this was going to be a raw edge fused wall hanging. I LOVE Cherrywood hand dyes for fused work.  I began by searching the Van Gogh museum online, searching for inspiration.  It took a while. I wasn’t looking for irises, 


poppies, 

sunflowers, 

wheatfields,

or landscapes. After spending a good amount of time on the online Van Gogh gallery site, I finally found just the painting for me.


 August 1883, The Hague, Netherlands.
Vincent Van Gogh painted ‘Lying Cow’, oil on canvas.  This painting is now in a private collection in France.

I love the blue hues of the challenge pack. It is a requirement of the challenge that your piece must be 75% of the challenge pack colors, with the entire front to be composed entirely of Cherrywood fabric (the exception being white as they don’t dye white fabric) No problem for me – I have Stash!

However, in an effort to converse fabric, I need to come up with a base fabric to fuse to, rather than construct the pieces jigsaw puzzle style, where each piece has an underlip on certain edges.  But not muslin. Something lighter, but not having an open weave. Something I had on hand. Something 100% cotton, light colored so I could trace on it, without any finish that would impede the fusing and preferable already the right size to work on.

Okay – don’t laugh!  I know that’s a lot of requirements but I have Stash and am determined to use it.  Trouble is, that stash is 95% batiks and hand dyed fabric, which I was trying to conserve.  It took me a bit of brainstorming but eventually, viola! A flour sack towel!  I had bought a few of these at Yoder’s Department Store in Shipshewana awhile back with no idea I’d be using one of them for a quilt base.  It turned out to be just the thing!  And yes, I will be buying a few more whenever I end up back that way next.
  
Using 'Lying Cow' as my inspiration, I sketched out the cow just the head and shoulders, for my challenge quilt. Then I traced it so I could produce a paper pattern to cut apart.  Then I traced it again, on the flour sack towel. 


One of the hardest things to do was to limit my palette as I couldn’t carry all my stash with me so some ruthless decision making was done. In a way, it was good because there was no dithering about which shade of pink/coral/blush/rose the tongue would end up. Decide & move On! became my motto.  It worked!

I quickly narrowed the background down to three (3) greens.


Those were cut out and hand stitched in place to conserve (there’s that word again) the fusible I had on hand.  


I didn’t have time to even begin to try to track down WonderUnder 805 in Switzerland.

Up next - cow parts.